The ActiveState Platform
Take a quick tour of the ActiveState Platform.
This page explains the following features of the ActiveState Platform.
Dashboard

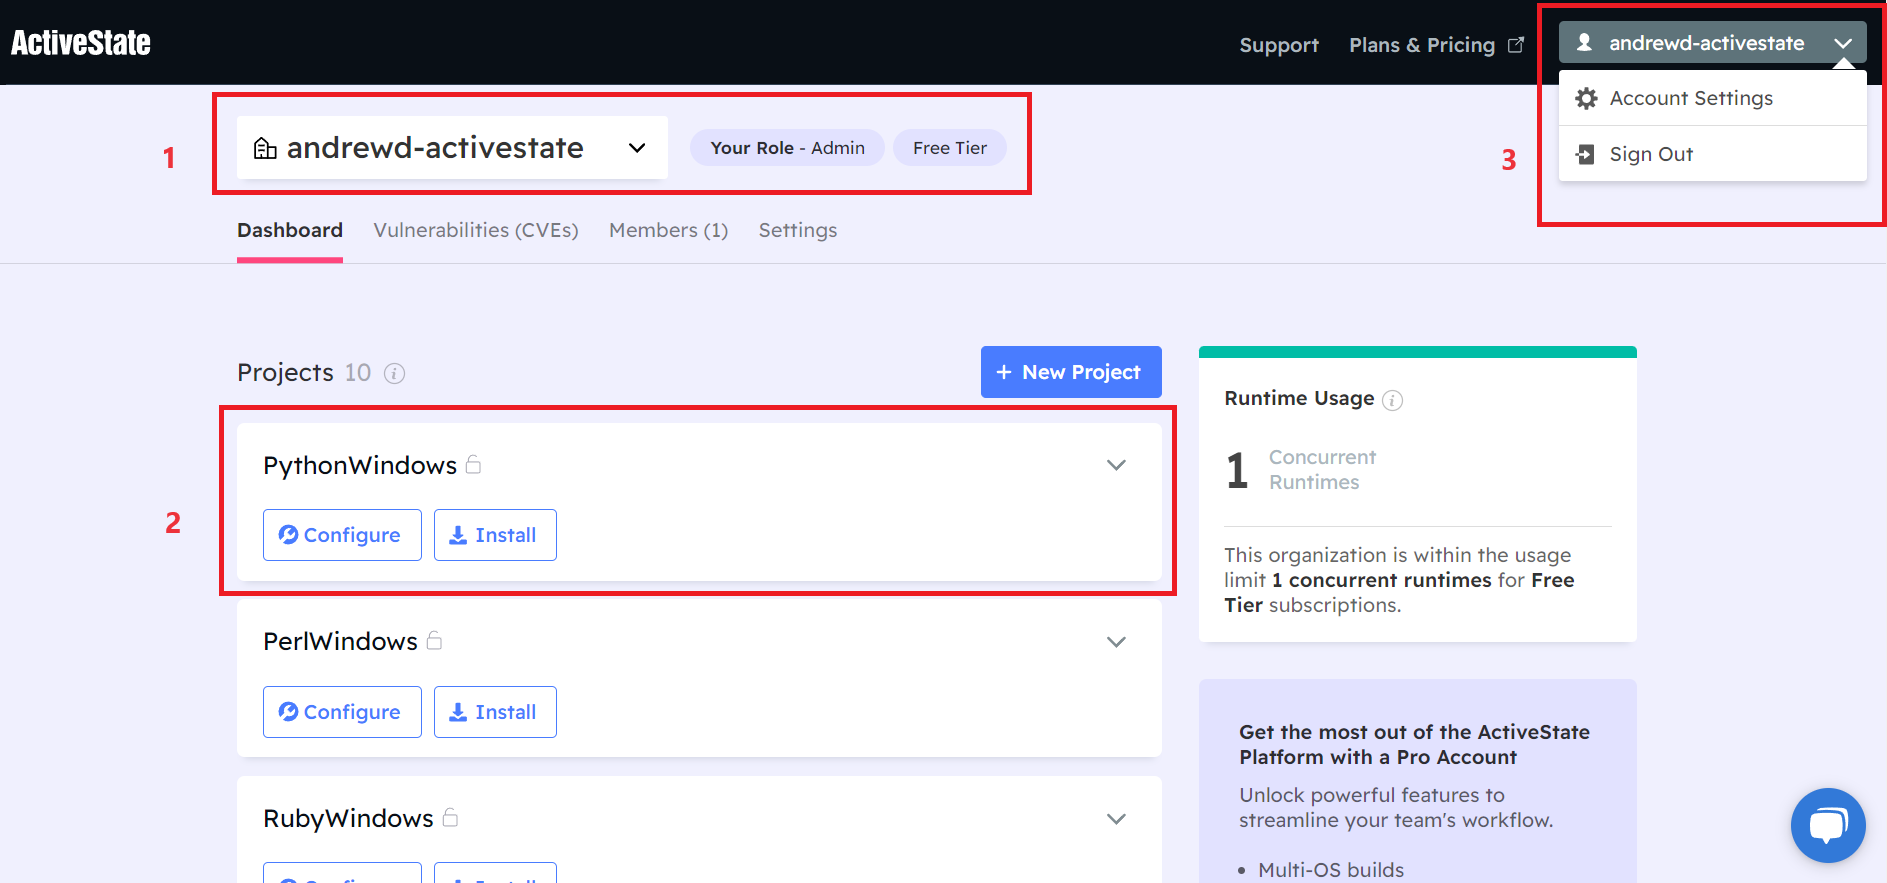
Successfully signing into your Platform account brings you to your Dashboard tab. The Dashboard provides information on
- Available projects
- Runtime usage
- Vulnerabilities that can affect your projects
- Organization members
Can all be accessed from your Dashboard. In the image above, three elements of your Dashboard are outlined.
- Organizational account information. Showing the organization you are currently viewing, as well as your user role (Admin), and account type (Free Tier). To change the organization you are currently viewing, click the drop-down menu displaying your current organization to select a new organization. To find out more about user roles see here.
- Projects allows you access to all current projects in the organization. Clicking any of the project names will bring you to that project’s Project Page .The Configure and Install buttons shown will direct you to the Configuration and Downloads Builds tabs of the Project Page (respectively)
- Clicking the drop-down menu showing your username will allow you to alter your account settings (associated email address, password, etc.) and sign out of the Platform.
Vulnerabilities (CVEs)

In the Vulnerabilities (CVEs) tab you will find a table summarizing the vulnerabilities associated with the organization’s projects, including
- The severity of the vulnerability (“low”, “medium”, “high”, and “critical”)
- The NIST name of the vulnerability, as well as a link to the National Vulnerability Database containing further details
- A brief description of the vulnerability
- Links to the project(s) affected by the vulnerability
- The specific packages affected by the vulnerability
Using the Search and Filter tools you can find specific vulnerabilities, or projects, or sort the results by severity or public or private projects.
Members

Information on the members of the organization, including who has access and who has been invited to join. More information on dealing with members can be found here.
Settings

The Settings tab displays organizational information such as the tier, available runtimes, and options to delete or leave the organization. This is not to be confused with the Project Settings tab on the project page.
Project pages
Each of your ActiveState projects will have a unique project page on the Platform. It is the best way to view, edit, and update aspects of your ActiveState project. After selecting a project from the main Projects tab in the top menu, use the tabs below the project name (Overview, Configuration, Download Builds, History, and Project Settings) to find your way around the page.
Overview

The Overview tab on the project page is a snapshot of the current attributes of your project. It has a short, user-generated description of the project as well as a list of all current vulnerabilities (and their severity), details about the specified language and OS of the project, and a link to install the runtime.
You can choose to share this project by clicking the Share button (provided the project is public and/or the recipient is a member of the project’s organization), or fork the project by clicking the Fork It button.
Configuration

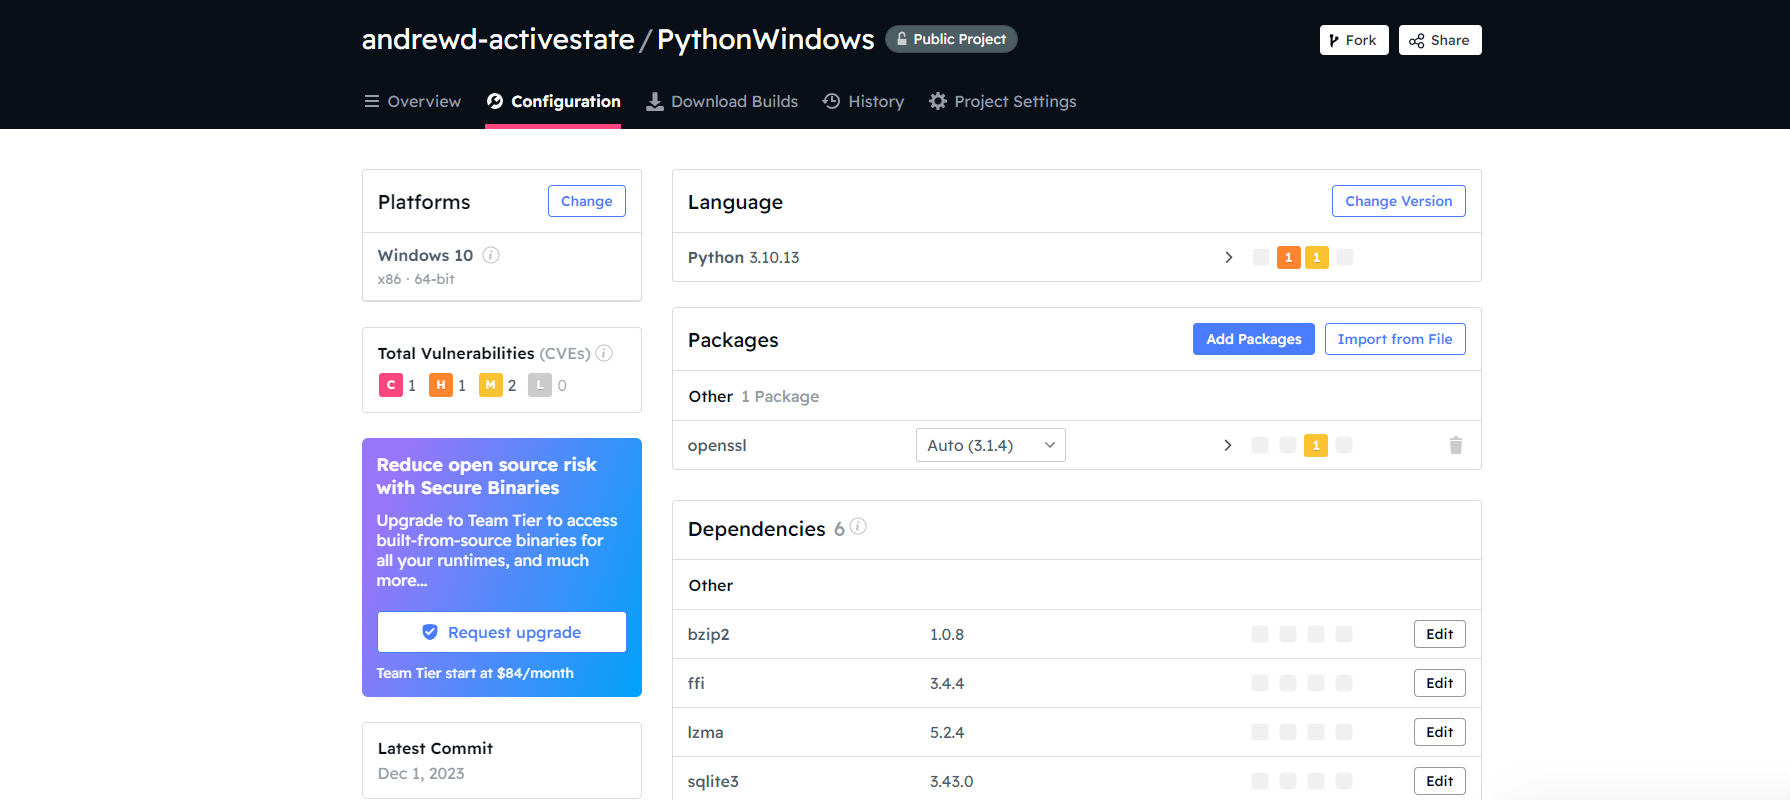
This tab is used to make changes to an existing project. You can find a list of all packages, known dependencies, and their version numbers and CVE statuses. The Configuration tab allows you to
- Change the language of the project
- Change the operating system(s) of the project
- Add, delete, and update packages
- Import packages from a requirements file
Download Builds

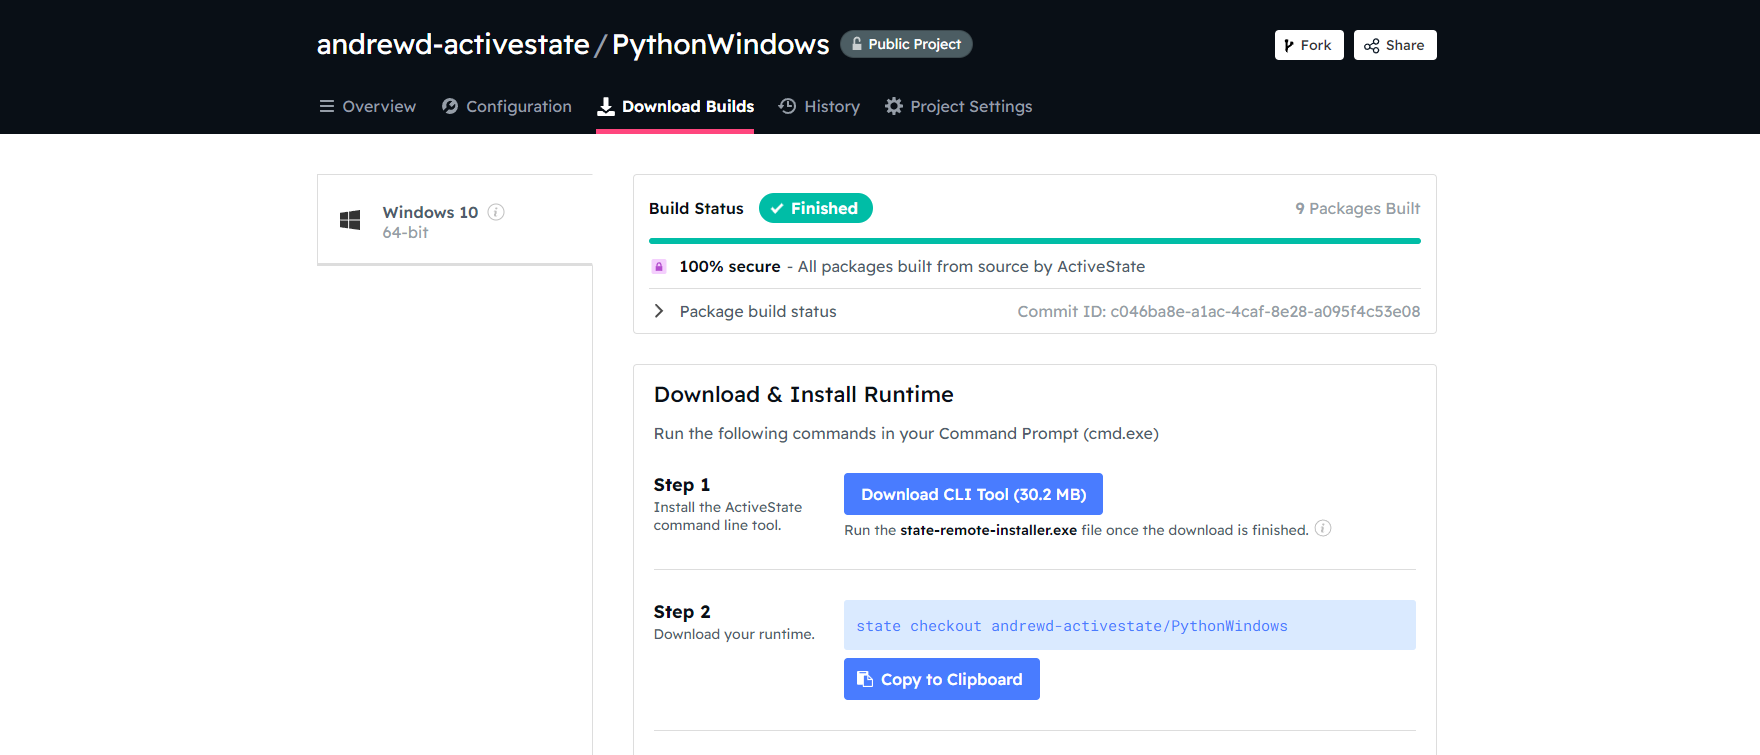
After creating or making changes to an existing project, you can track the progress of your project’s “build” in the Download Builds tab of your project page. If you prefer not to wait until your build is finished, after your build is complete you will be sent an email from notifications@activestate.com notifying you that “Your build is ready”. Clicking the link in the email will bring you back to your project’s Download Builds tab.
The tab has directions to install and update the project on your local machine. The options to install your runtime will differ depending on the language/operating system of the project as well as the status of the account holder (for example “Enterprise” vs “Free Tier”).
History

The History tab of your project page is a record of all changes that have taken place since the project was created. You can view your project at each change, or “commit”, in its history and revert to that commit by clicking Revert to this Commit. This can be helpful when you need to switch to a previous version of the project to continue development, or recover a project at a known stable state.
Project Settings

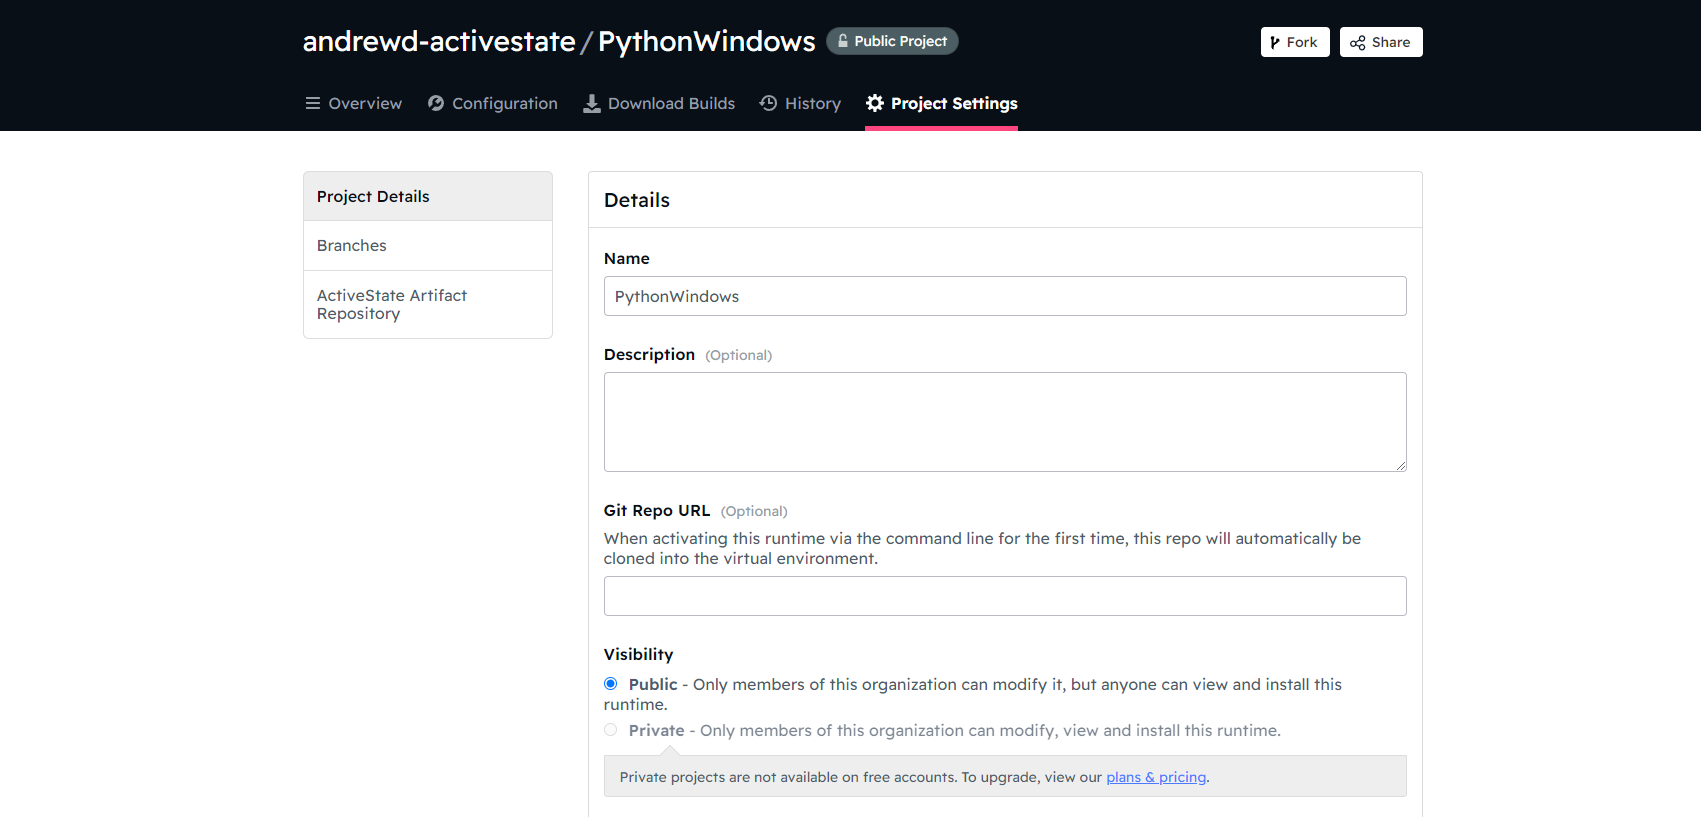
Here you can make changes to the details of your project, as well as delete it entirely from its organization. Some of the details you can change in the Project Settings tab include
- Project name
- Project description
- Git repo url
- Project visibility (public/private)
- Move a project to another organization
- Delete project (this is permanent and cannot be undone)
Information on the ActiveState Artifact Repository and Branches are available to selected users, depending on their account status.