Understanding the Branch Workflow
You must be on a paid tier to take full advantage of the branching feature. For more information on pricing visit https://www.activestate.com/solutions/pricing/
Branches on the ActiveState Platform allow users to have more flexibility when working with complex projects. Branches bring support for experimental builds, managing complex multi-platform projects, different builds per environment, and more. The benefits of using branches in your project include
- Working on a number of different ideas in progress at any time, including those requiring packages that are not part of your original project.
- Collaborating on a complex project with a base set of common packages, but with slight differences between branches.
Changes made on a branch are localized, so you can safely experiment on other branches without impacting your main branch. Branches can also be kept in sync with changes made to the main branch, assuring your entire project can be free of security risks.
Create a branch
- Login to the ActiveState Platform and open an existing project.
- Click the Configuration tab.
- You will notice that you are on the main branch.
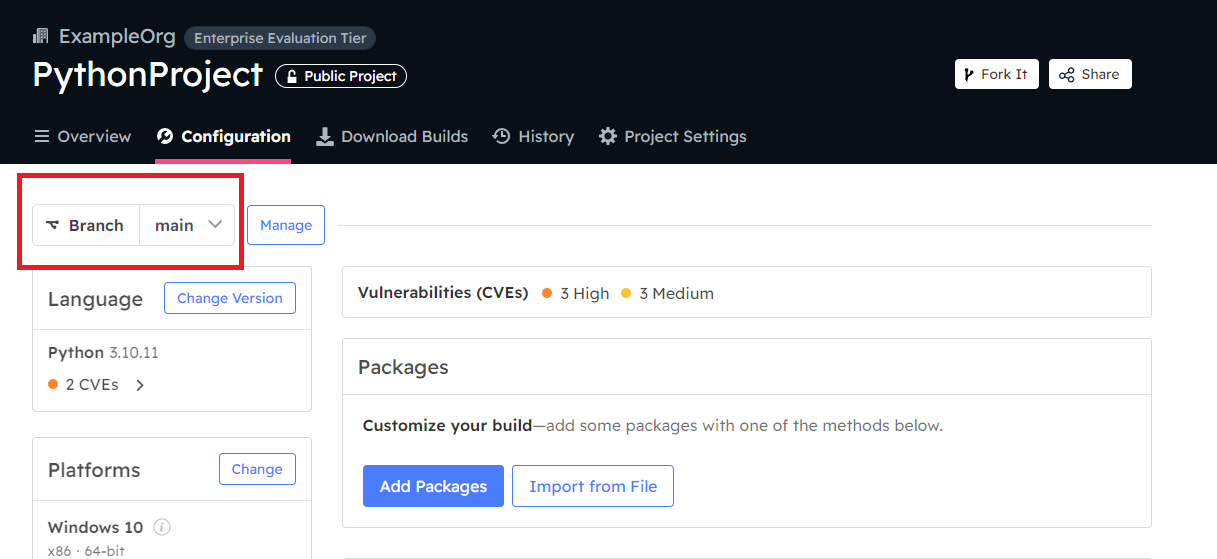
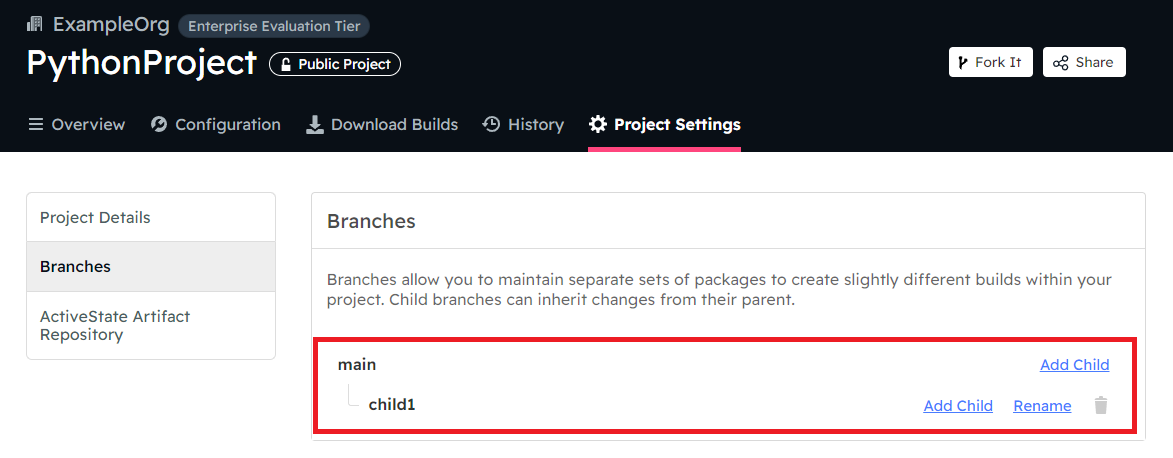
- Click on Manage (or go to Project Settings tab and click Branches)
- You can now add a new branch to the Main branch.
- Click on Add Child and name your branch before clicking Add.
- You can add associated “Child” branches to the main branch, or other branches in the project.
- You can now see your new child branch in the UI.
Making changes to a branch
You can now configure each branch to suit the needs of your project. You can add or remove packages included from the main project, as well as change the language version and even the operating system requirement for the branch.
To make changes to your branch go to your project’s Overview tab and click the Configure button next to the branch you wish to change.
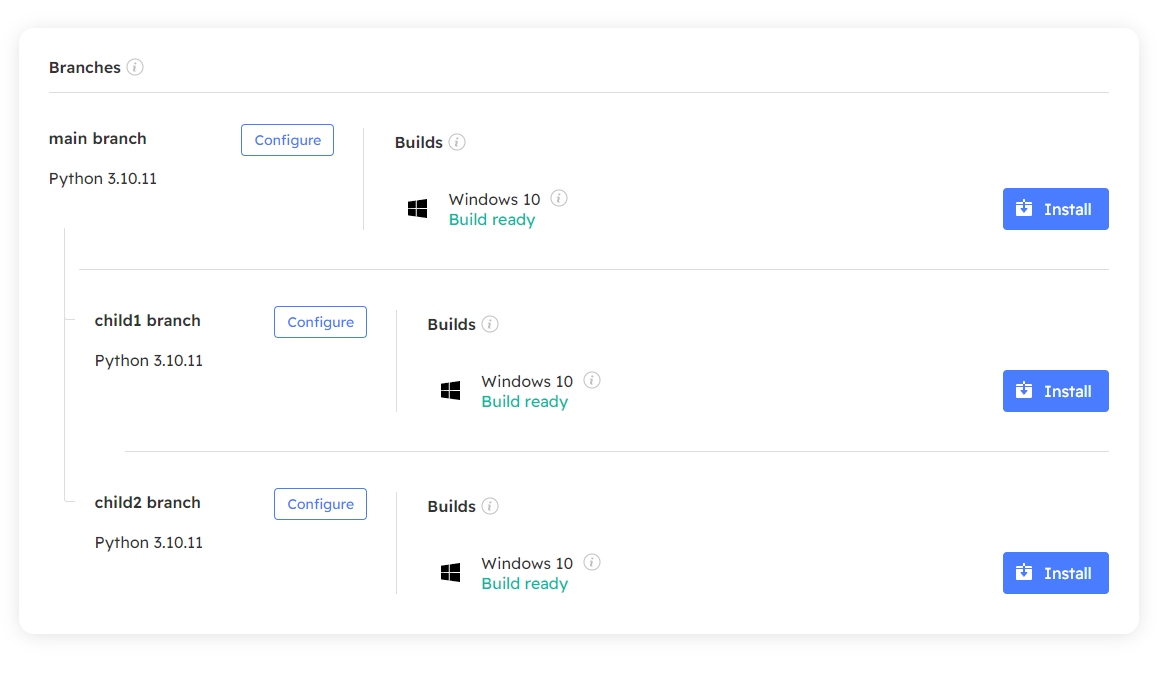
You can make changes to this branch the same way you would with the main project. Except any changes you make will be restricted to only this branch, and will not affect other branches or the main project.
Updating a branch
If the main branch has been updated (by you or another authorized owner), each associated branch will get a notification prompting you to keep it in sync with the main branch.
This is especially useful when
- Vulnerabilities were found in a package that exposed a security risk.
- A proven package needs to be added to the project that would benefit all users.
Updating branches is voluntary, but may be an expectation of the main project or your organization. See below to update your branch and sync to the main project
Using the Platform
- Go to the Main branch of your project.
- Make any change that would trigger a commit.
- For example, add a new package to the project, or change an existing package version.
- Commit the changes.
- Select the child branch using the “Branch main/” dropdown.
- On the Configuration tab of the child branch you will see a notification to update the branch.
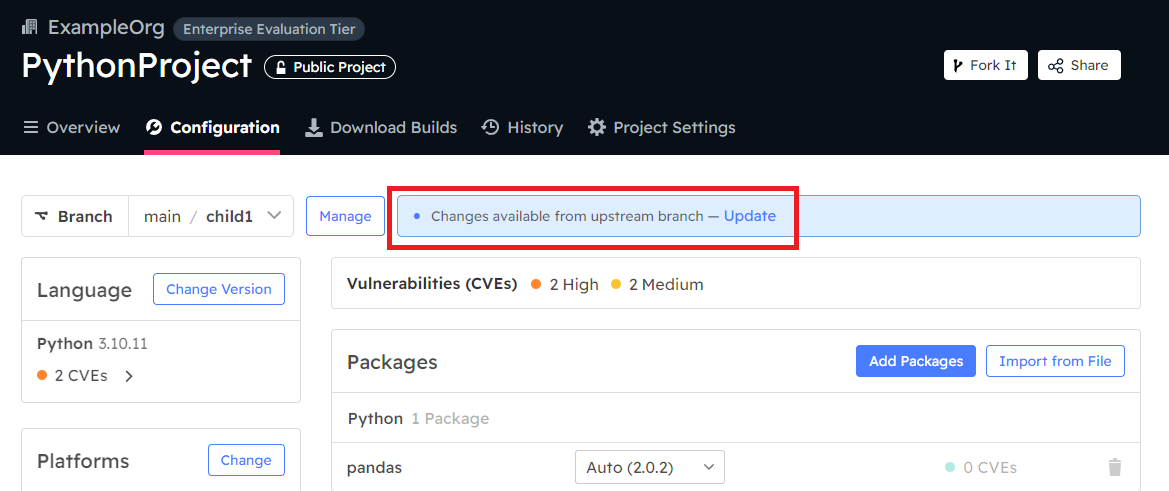
- Clicking Update will show you the changes between your current child branch and the main branch. If you choose to update your branch, click on Update
- This will sync your branch to the main project and trigger an automated commit with the description “Merged upstream changes”.
All merging must be done using the Platform. The State Tool currently does not allow merging upstream changes into a child branch.
Switching Branches using the State Tool
- Open your project with the State Tool.
- Enter
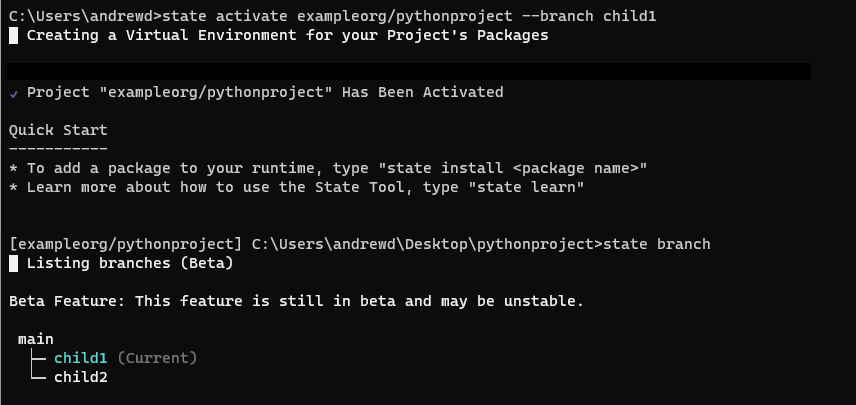
state branchto see available branches of your project. - Enter
state switch <branchname>to change branches.
You will see a Successfully switched to branch: <branchname> message in your command terminal when the switch has been successful.
Download builds from branches
Using the Platform
The Overview tab of your project page will show Install buttons for your main project as well as all available branches. After clicking Install, follow the prompts in the “Download & Install Runtime” window to install the branch.

Using the State Tool
Run state checkout <orgname>/<projectname> --branch <branchname> to download the project branch directly. Then enter state use <orgname>/<projectname> to set the branch as the system default. To verify that you are working on the correct branch, enter state branch to see your current working branch as well as other available branches.
