Cloudera Machine Learning ML Runtime Integration
With the ActiveState Platform, you can easily generate ML Runtimes to securely extend your Cloudera Machine Learning (CML) environment with the latest Machine Learning tools and frameworks. All ML Runtimes need to be packaged in CML-compatible Docker images before being imported.
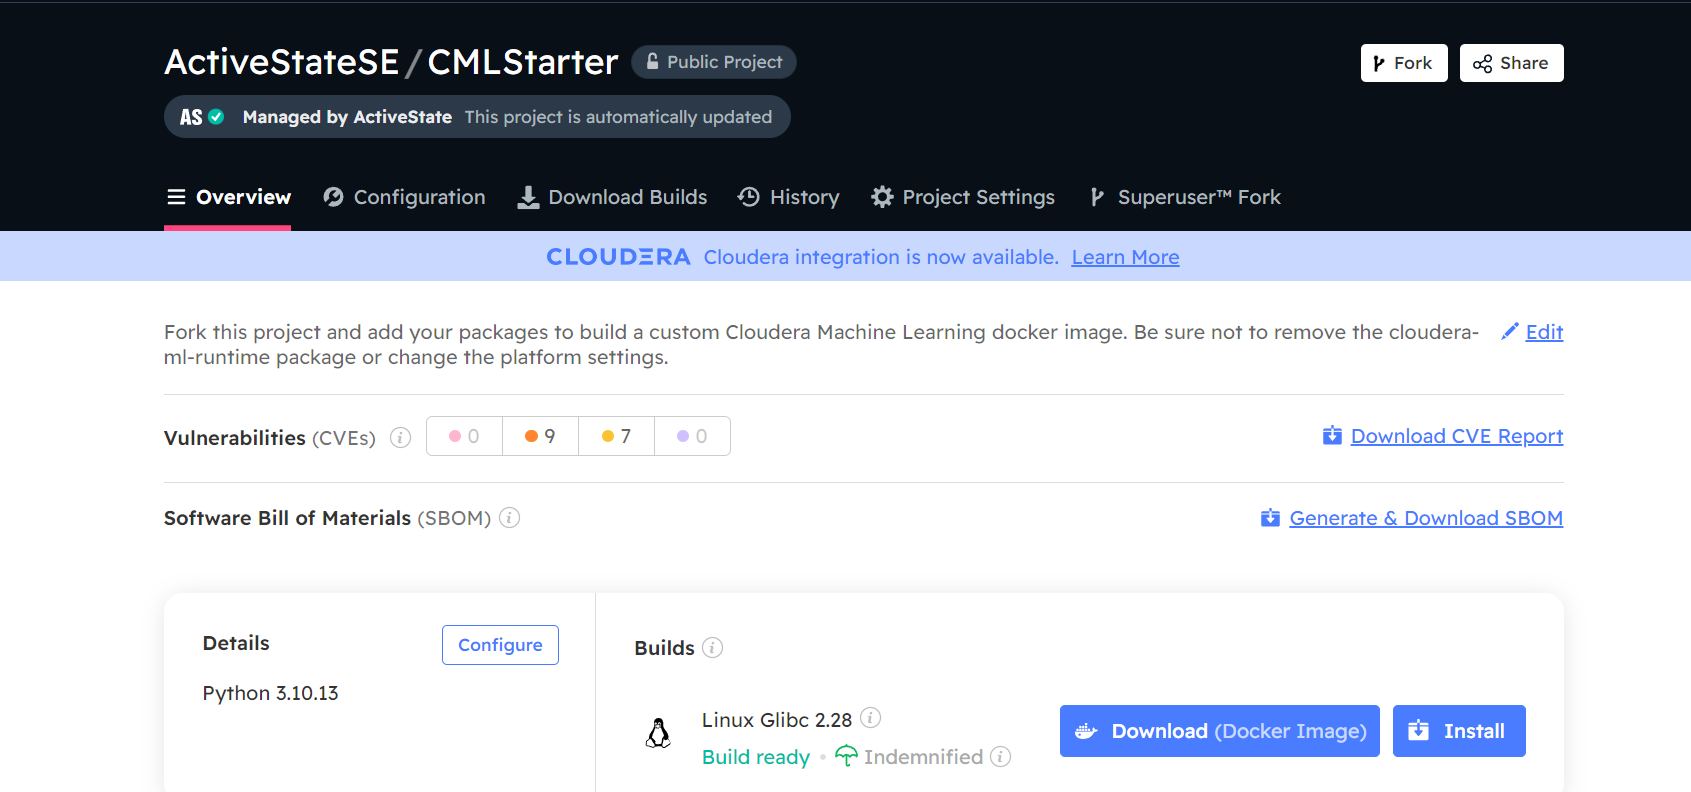
To immediately begin working with your Cloudera Docker image, make a fork of our CML Starter project and download the image from the Download Builds tab of your forked project page.

After downloading the image, go to step 3 in the list below to complete the integration.
To create a new project, or convert an existing project the following sections will walk you through building an ML Runtime on the ActiveState Platform and bringing it into CML.
Creating a compatible Python runtime on the Platform
For users running Spark 2 workloads, Python 3.7 is now officially end-of-life. To get extended support contact us.
To guarantee a seamless integration
- Ensure that your project uses Python 3.7.17.3 or a more recent version. Failing to do so will result in an error when integrating the “cloudera-ml-runtime” package.
- Verify that the project’s name or organization does not include the term “Cloudera”.
To create a compatible runtime
- Go to the existing project page of the runtime you want to bring to CML. If you do not have one already, create a new Python project for the Linux operating system.
- From the Configuration tab, click Add Packages.
- Enter “cloudera-ml-runtime” and click Add to add the package to your project. Your project can contain other packages, but the “cloudera-ml-runtime” package must be added to your project to ensure compatibility.

- Click Next to save your selection.
Packaging your runtime in a CML-compatible Docker Image
- Go to the Configuration tab on your project page.
- Click Change Version in the “Language” section.
- Under Linux Glibc 2.28 click the Docker Image box as shown below. Deselect other operating systems where necessary, and ensure that only “Linux Glibc 2.28” is selected.

- Click Close to save your selection.
- Click Save Changes to start your build.
- After your build is complete, go to the Download Builds tab on your project page.
- In the “Download and Install Options” section, click the Install via Docker tab.

- Click Download Docker Image to save it to your machine.
Loading and tagging your Docker image
Ensure that your client system has the Docker engine installed and running. To complete the integration, you will need to
- Load your newly created image into Docker
- Tag it appropriately
- Push the image to your registry, and then into CML
To load your Docker image
- Open a command terminal and go to the directory containing the
.tarfile you downloaded from ActiveState. - Copy and paste the first command from the Download Builds> Install via Docker section of the page and paste it into your command line. The format should be similar to what’s shown below.
docker load -i orgname-projectname-docker-commitid.tar
To tag your Docker image
- Copy and paste the second command from the Download Builds> Install via Docker section of the page and paste it into your command line. The format should be similar to what’s shown below.
docker tag orgname-projectname:commitid <your-registry-name>/orgname-projectname:commitid
- Replace <your-registry-name> with details provided by your Docker registry provider. If you are using Docker Hub just enter your Docker Hub username here. Different private registry providers may require different information for the registry name and may include
- Host name
- Port
- Namespace/username
To push your Docker image to a repository
Copy and paste the third command from the Download Builds> Install via Docker section of the page and paste it into your command line. The format should be similar to what’s shown below. Replace your registry name with the same registry used above.
docker push <your-registryepository-name>/:<tag>orgname-projectname:commitid
The Docker image of your project has been successfully tagged and pushed to a registry, and can now be imported into your Cloudera CML instance.
Loading the image into CML
To load your new Docker image containing your ML Runtime into your CML instance, open your CML console and
- Click Runtime catalog.
- Click Add a runtime.
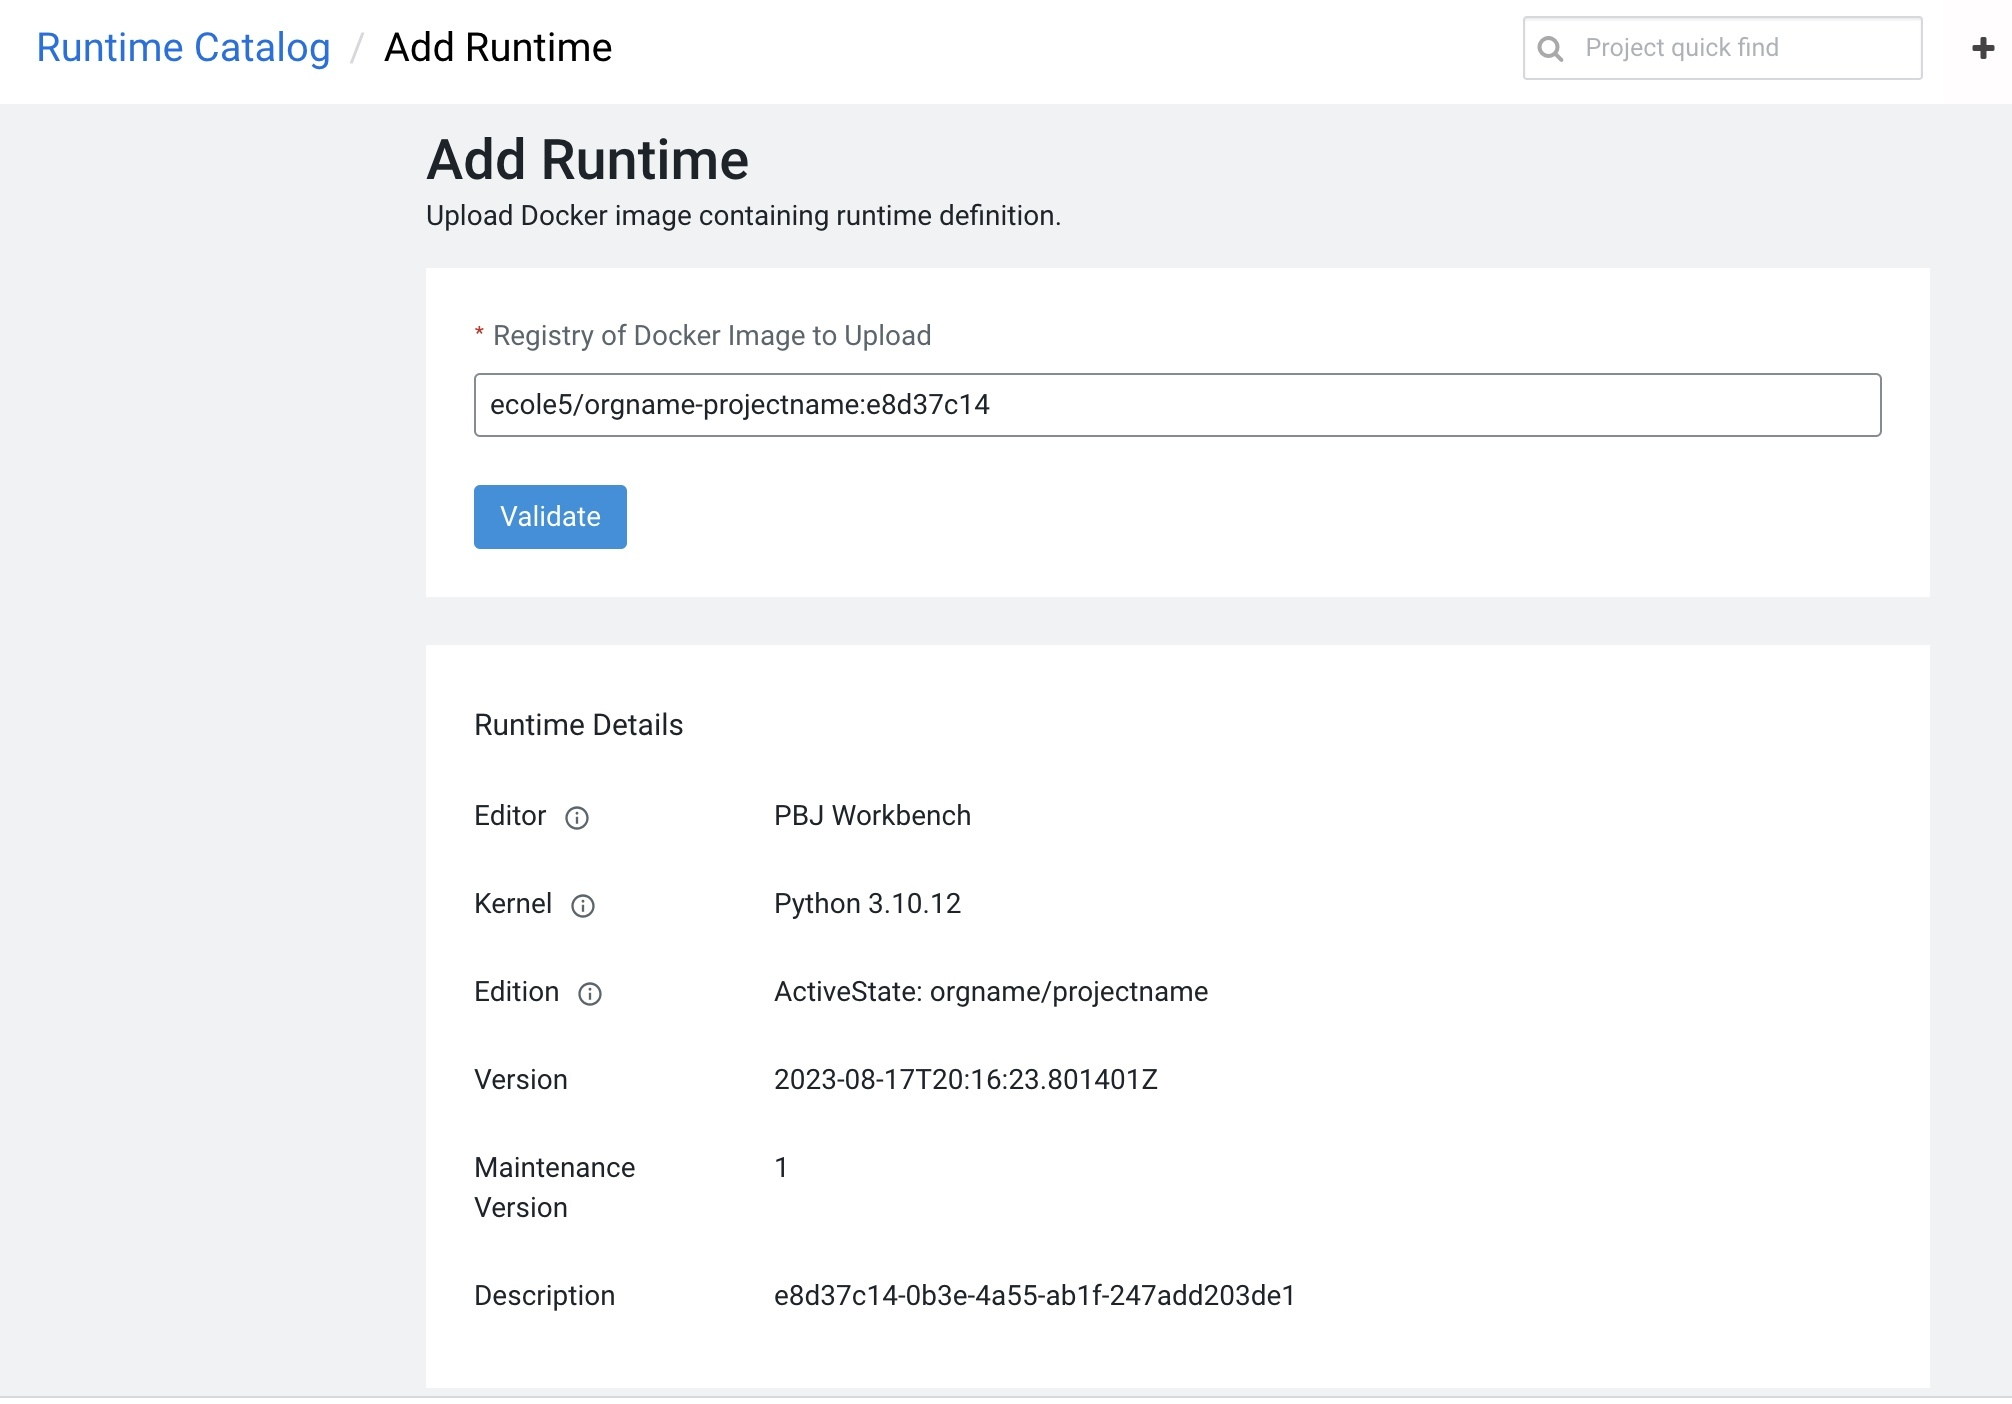
- Copy and paste the registry information into the “Registry of Docker Image to Upload” field provided using the following format.
<your-registryname>/:<tag>orgname-projectname:commitid
An example is shown below.

This ML Runtime will now be available in your CML catalog. You can now add this runtime to your CML projects.