Komodo Add-ons
Komodo add-ons (previously known as extensions) are used to extend the functionality of the IDE. Komodo is based upon the Mozilla framework, so it has the same add-on capabilities as Firefox does, which means the Mozilla extension documentation also applies to Komodo as well. These Mozilla resources are a great place to begin understanding the fundamentals of add-ons.
Managing Add-ons
Add-ons are managed through the Komodo Packages interface.
Creating an Add-on
There are two types of Add-ons you can create:
- Feature add-ons: Extensions to add new interfaces, components, and functionality to Komodo.
- Language add-ons: Extensions to add (or enhance) support for a particular programming language in Komodo.
Note: The type of add-on you want to create determines the steps you need to follow to create it.
Feature Add-ons
The best way to start creating a new Komodo feature is by utilizing the Komodo userscript system, which you can use to quickly and easily create new functionality for Komodo, such as adding user interfaces, responding to keypresses, opening files, or performing text manipulation in the Komodo editor.
You can see great examples of Komodo userscripts on the ActiveState Code site. You can write userscripts in either JavaScript or Python - so you get to choose which language works best for you.
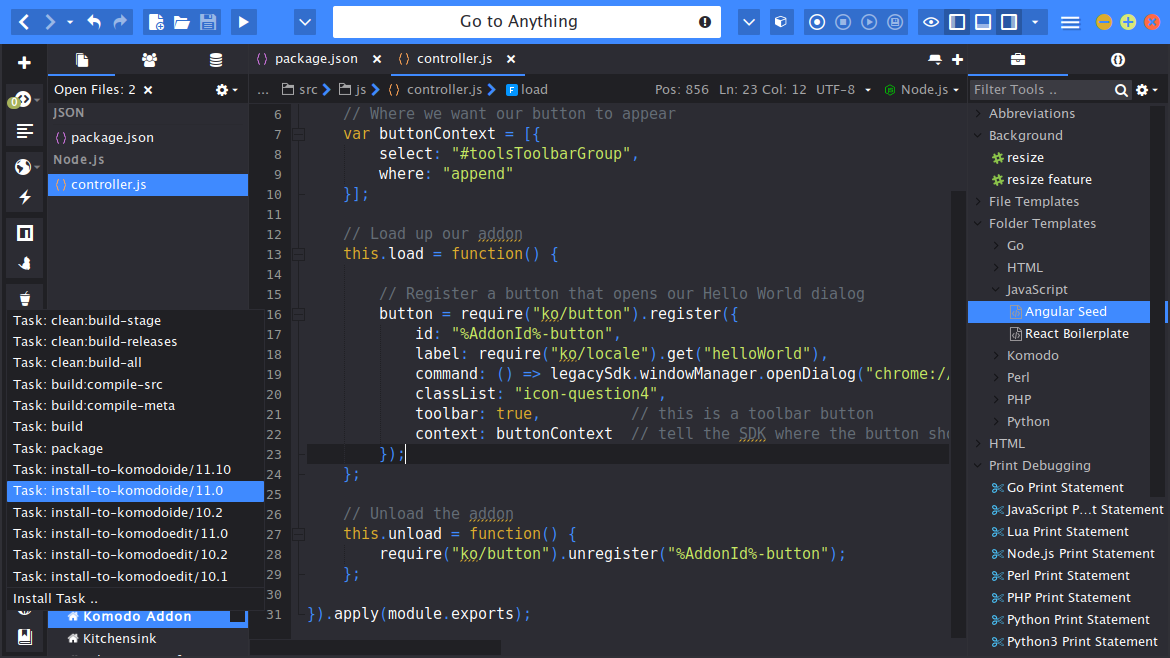
If you wish - you may then turn your userscripts into a Komodo add-on (so it’s easily installable and will automatically update when you make changes to it). To get started, select Project > New from Template > Create Komodo Extension. When using a Komodo add-on project, you’ll find there is a “Build and Install” userscript added to your Komodo toolbox, which you can use to create and install the add-on xpi file.
Language Add-ons
Language add-ons are used to extend Komodo’s knowledge of programming languages (like Java, Matlab, Mel). This can control things like Language Detection, Code Coloring, Editor Indentation, Syntax Checking, Code Intelligence (completions and calltips) and Debugging.
The easiest way to create a new Komodo language is to select Project > New from Template > Create Komodo Language. Fill out the add-on details, then you can customize the language details (like the comment styles, keywords, and code intelligence) and create the project. You’ll find there is a “Build and Install” macro added to your Komodo toolbox, which you can use to create and install the add-on xpi file.
Once you’ve got the basics of the language down, you can further tweak the generated files to your liking and then re-build and re-install the add-on to test it out. Below is a description for the generated files and folders of the add-on:
- install.rdf, chrome.manifest: Registration information for the add-on (e.g. name, author, homepage) and the user interface to load for the add-on.
- content: Contains the UI elements that are loaded into the Komodo UI, as well as loading any necessary JavaScript files.
- components: Controls the registration of the language within Komodo, provides information about the language (name, file extension, etc…).
- pylib: Provides code intelligence facilities, for code completion popups, calltips and code browser information.
- udl: The UDL files provide syntax highlighting (coloring) for your language, including keyword, strings, numbers and comment styling.
- templates: The templates folder holds the custom language templates that will be available in Komodo’s New File from Template dialogs.
User Defined Languages (UDL)
Komodo’s system for defining multi-language syntax lexing (coloring) is called UDL (User Defined Languages). UDL files are written in a language called Luddite, which then gets compiled into a Scintilla lexer package for use inside Komodo. All udl files are stored inside the “udl” folder of your extension.
Syntax Checking
The Komodo documentation for linters is quite extensive, and there is also a good article on adding syntax checking to a Komodo extension on the ActiveState blog.
Code Intelligence
Code Intelligence is enabled in a Komodo language add-on by adding a pylib/codeintel_langname.py file to your extension. It works by first triggering a completion event and then responding to an evaluation request.
- Trigger: Whenever a keypress occurs in Komodo, the
trg_from_posPython method in your codeintel_language file will be called. It will be up to you to decide if you want to offer completions at that point - when you do, then you’ll need to return a Trigger() instance. - Evaluation: Handles the lookup for completion/calltips. The
async_eval_at_trgmethod is called when the trg_from_pos method has returned a trigger. It’s job is to provide the list of completions or the calltip string. - API Catalogs: A collection of class/function/variable information. API Catalogs are only applicable for the default Komodo Code Intelligence languages (i.e. Python, JavaScript, PHP, …). You can achieve the same affect as an API Catalog by defining/outlining a code file and then including that on the language search path.
Creating Your First Add-on
Tools
You should install these useful add-ons when developing your own Komodo add-on:
- Komodo Developer Extension
- DOM Inspector
- Element Inspector
To install them hit the “Go to Anything” search field in your toolbar, or use the shortcut Ctrl+Shift+O (or CMD+Shift+O if you’re on OSX), then select “Packages” and search for the package name you wish to install, and press enter on it to install it.
Bootstrap Your Add-on
To create an add-on select from the menu Project > New from template > Create Komodo Extension. This will then open up a window to select a working directory where the project files will be generated and stored. It will then open up a new windows titled ‘Welcome to the New Komodo Extension’.
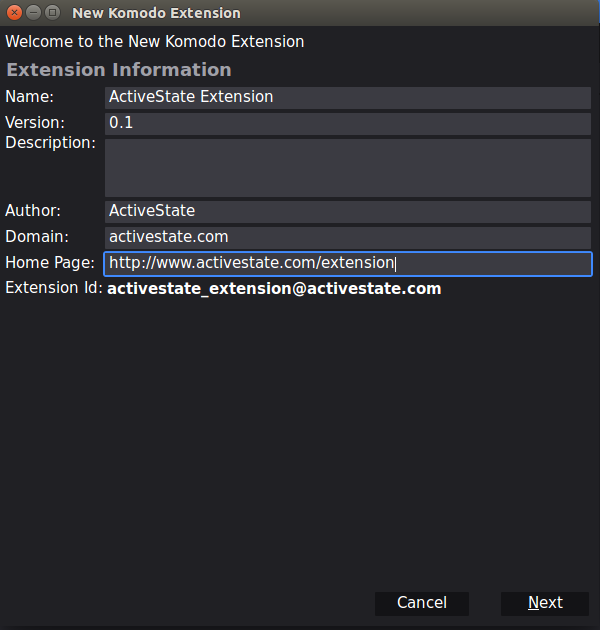
This dialog holds the following fields:
- Name: The Name of the project. The name is derived from the project name that was used to start the project.
- Version: The version that will be used to identify the project level. It’s suggested that you use the Semantic Versioning. Starting at 0.0.1
- Description: Give a description of the project as this is what will appear in the add-on page of the completed add-on.
- Author: Your full name.
- Domain: This is your personal namespace, it does not have to be an actual website domain. myname.tld.
- Home Page: The home page for your add-on, for example this can be your github repository url.
- Extension Id: Is the unique identifier that is combination of the domain and the extension name.
Once completed click on next and it will display a new window with instructions
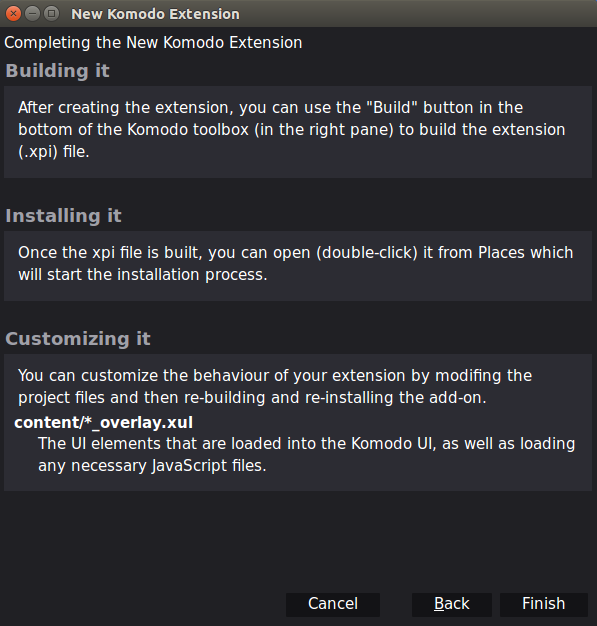
Go ahead and read it and then press Finish.
What Get’s Bootstrapped?
Once you finish the short wizard to generate your add-on Komodo will create a couple of files and tools for you to work with.
File Structure
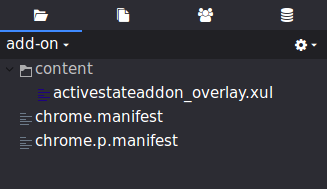
Content is the directory where all the files used in the extension are stored. Such as the overlay files, skins, language, graphics, javascript etc.
There are four main files:
[extension-name]_overlay.xul: This is the projectname overlay file that will be displayed when the extension is installed.chrome.manifest: This file is used to register your content with the Chrome engine.chrome.p.manifest: This is a development register file for your content with the Chrome engine.install.rdf: This file contains general information about your extension and the developers information.
More information can be found on Mozilla Developer Website
Tools
Several tools are installed in your toolbox when creating a Komodo add-on.
- Build: This macro will build and create an
xpifile of the project. - Build and install: This macro will build and create an
xpifile of the project as well as install it on Komodo. Note that this will require a restart of Komodo. - Reconfigure: This will allow changes to be made to the
install.rdffile. - Docs-Extensions: This will open up the help file to explain Komodo Extensions.
Working on your add-on
After generating your add-on (see above) use the toolbox to run the tool ‘Build and Install’. This will display the classic Add-ons manager window.
After installing the extension you will be prompted to restart Komodo in order for the changes to take effect.
Now you’re set to start creating your own add-on. The easiest way to get started is to reference existing add-ons or check the additional resources below to find out how to write a Komodo add-on. Note that Komodo is based on the same system as Firefox, so most things that apply to Firefox add-on development also apply to Komodo.
Additional Resources
SDK Documentation
Sample Projects
These projects can serve as a good foundation to work-by-example.
- Markdown Viewer - Good all round introduction, touches on most aspects of add-on development.
- Focus Mode - Simple straight forward add-on that handles with UI interaction and pref handling.
- Projects Scope - Great little example of how to extend Commando/Go To Anything.
Add-on Development Tools and Useful Links
Komodo Developer add-on v1.25: This add-on provides helper tools for working with JavaScript and Python inside of Komodo. If you want to play around with the JavaScript API, do some simple python coding tests, probe the Komodo API for an add-on, or play with the internals of Komodo, then this is for you! When installed, you can use the Tools > Extension Developer menu to access the JavaScript Shell and Python Shell, from which you can control and interact with Komodo.
DOM Inspector: The DOM Inspector is a tool that can be used to inspect and edit the UI structuring used by Komodo. The DOM can be navigated using a two-paned window displaying a variety of different views on the document and all nodes within. With this tool you can interact with the DOM Elements, JavaScript objects and the CSS styling. Once installed, use the Tools > DOM Inspector to launch and inspect Komodo. See the Mozilla Intro here for using the DOM Inspector.
GitHub Search: GitHub provides a fast source code search engine. You can use this tool to find code examples for working with different parts of Komodo.
Error Console: You can use this one-line Komodo JavaScript macro to open the error console - which will bring up a dialog that will show page errors and JavaScript loading errors:
window.openDialog("chrome://global/content/console.xul", "_blank");Mozilla Extension Development Documentation: Thanks to Komodo being based upon the Mozilla framework, Komodo has the same add-on capabilities as the Firefox browser, making Komodo add-on development a breeze - you can even re-purpose existing Firefox add-ons to work within Komodo.
Included Komodo Add-Ons: These are the Komodo add-ons that are included in the regular Komodo builds. You will also find these add-ons in the “extensions” or “distribution/bundles/” directory of your Komodo installation.
Komodo Add-Ons: There are many Komodo add-ons that have been developed, which are not included in the regular Komodo installers. A lot of these are hosted on GitHub and are great examples for building Komodo add-ons.